How to blur the background in Lightroom?
How to blur the background in Lightroom? 2024 [Mobile + PC]
Are you wondering whether or not Lightroom offers a background blur option, Are you tired of pictures with an unwanted background? or you want to blur unwanted objects from your images, Adobe Lightroom offers several ways to achieve results.
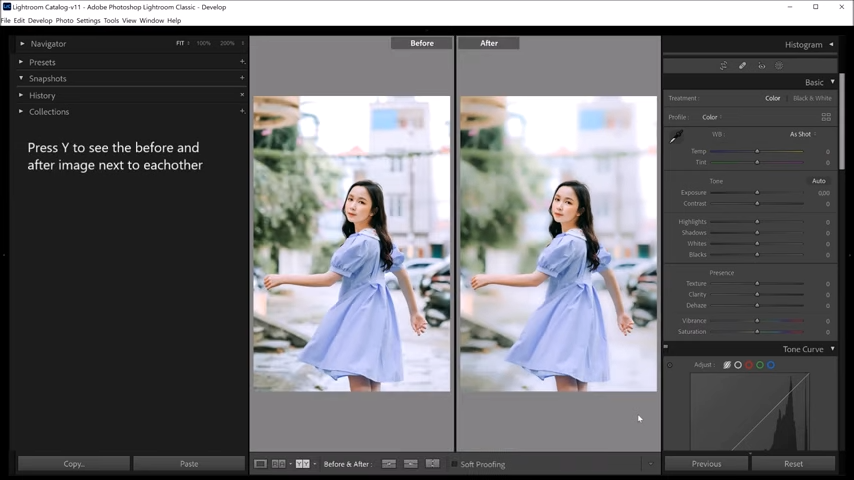
By softening the background, you create a sense of depth in your photo, making it appear more three-dimensional. This draws the viewer’s eye directly to your main subject, whether it’s a captivating portrait, a majestic mountain range, or a vibrant flower.
Lightroom has no dedicated “blur background” button, but don’t worry! We’ll explore some clever workarounds using adjustment tools readily available in the software. With some practice, you’ll be a background-blurring pro in no time, taking your photos to the next level!
Here is a step-by-step guide for blurring the background in Adobe Lightroom.
How to Blur Background in Adobe Lightroom CC for Mobile App
To blur the background in Adobe Lightroom CC for the mobile app, follow the simple steps. With these steps, you can effectively blur the background of your photos using Adobe Lightroom CC for the mobile app.
Select Photo: Open the Lightroom CC app on your mobile device and select the photo you want to edit.
Edit tools: tap the edit icon at the bottom of the screen to access the editing tools.
Select selective tool: Scroll down, find the editing options, and choose the selective tools. It is like a circle with a plus sign inside.
Select Area: Tap on the area of the photo you want to keep in focus. Here, you can also adjust the size of the circle to cover the image.
Adjust Blur: Look for the blur slider and slide it right to increase the blur effect on the background. Select the intensity of the blur your choice.
Redefine the Mask: If you want to redefine the mask, use the brush or eraser tool to remove any parts that should not be blurred.
Save, Export, or Share: After this, tune the other aspects of the image, like exposure, contrast, or color, if necessary.
After that, checkmark or save the edited photo and export the edited photo to your device gallery to share it on your chosen social media platform.
How to Blur Background in Adobe Lightroom CC iPhone (IOS)
To blur the background in Adobe Lightroom on an iPhone (IOS), follow the following steps:
How to Blur Background in Adobe Lightroom Classis (PC)
There are three ways to blur the background in Lightroom with the help of three different tools. These tools are
- Radial Gradient
- Brush
- Linear Gradient
Method 01: Blurring background using Brushes
With the help of brushes, you can apply blur to the selective part of your image. In it, we customize the softness, size, and intensity of the brush to achieve the desired results. Here is the step-by-step guide to using the brushes.
Import Images: In the first step, import images into the app library. From the file menu From the window, you can open the image of your choice that you want to edit.
Select Brush: To edit the photos, shift into the development module. On the top side, different adjustment tools are available, and you can select a brush.
Customize Brush: These brushes are customizable. You can customize them according to size and density.
Paint the background: Paint the background using the brush. You should not have to be precise by painting the background.
Erase errors: You can erase the color if you accidentally brush over the picture.
Apply Blur: Then go to clarity> effect and sharpness,
Adjust the value of clarity and sharpness according to your requirements.
Method 02: Blurring background using Radial Filters
A radial filter is a renowned tool used for blurring the background of images. It is widely used by users for blurring purposes. It is easy to use and blurs the background in no time. Follow these simple steps.
Method 03: Blurring background using graduate filter
In the first step, import the image to Lightroom and get into the developer mood.
From the top right corner of the application, locate the linear gradient tool.
Click on the tool and draw a line around the subject. In this way, you can separate the subject from the background.
After that, locate the sharpness panel and adjust the clarity, density, and intensity by selecting the values of your choice.
Blurring the background in Adobe Lightroom can add a professional touch to your photos by emphasizing the main subject and reducing distractions. Here are some tips and tricks for achieving a great background blur in Lightroom:
Tips and Tricks for Blurring Background in Adobe Lightroom
Conclusion
In conclusion, blurring the background is possible in Lightroom with the help of different tools. The method is slightly different for macOS and desktops. Lightroom’s masking and editing tools equip you to achieve your vision. Remember, practice makes perfect! Experiment with different techniques, refine your masking skills and have fun creating unique and captivating images that truly stand out. I hope you enjoyed the article and learned how to blur the background. If you have any questions, let me know in the comments.

![How to use Motion Blur Lightroom Presets? Detailed Explanation [2024]](https://lightroomodz.pro/wp-content/uploads/2024/06/Motion-Blur-Lightroom-Presets-768x432-1.png)